Sectional views in engineering technical drawings
Sectional views in engineering technical drawings
The following texts are the property of their respective authors and we thank them for giving us the opportunity to share for free to students, teachers and users of the Web their texts will used only for illustrative educational and scientific purposes only.
All the information in our site are given for nonprofit educational purposes
The information of medicine and health contained in the site are of a general nature and purpose which is purely informative and for this reason may not replace in any case, the council of a doctor or a qualified entity legally to the profession.
Sectional views in engineering technical drawings
SECTIONAL VIEWS
Introduction:
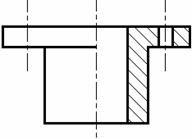
Sections and sectional views are used to show hidden detail more clearly. They are created by using a cutting plane to cut the object. A section is a view of no thickness and shows the outline of the object at the cutting plane. Visible outlines beyond the cutting plane are not drawn.
A sectional view, displays the outline of the cutting plane and all visible outlines which can be seen beyond the cutting plane.
The technique called section views is a very important aspect of design and documentation, and is used to
• improve the visualization and clarity of new designs,
• clarify multi view drawings,
• reveal interior features of parts, and
• facilitate the dimensioning of drawings.
For mechanical drawings section views are used to reveal interior features of an object that are not easily represented using hidden lines.
Types of sectioning
- Sectional View in a single plane
The example below shows a simple single plane sectional view where object is cut in half by the cutting plane. The cutting plane is indicated on a drawing using the line style used for centre lines, but with a thick line indicating the end of lines and any change in the direction of the cutting plane. The direction of the view is indicated by arrows with a reference letter. The example below shows a sectional view of the cutting plane A - A.

- Sectional View in two planes (Offset Sectional View)
It is possible for the cutting plane to change directions, to minimize on the number of sectional views required to capture the necessary detail. The example below shows a pipe being cut by two parallel planes. The sketch shows where the object is cut.

Half Sectional views
Half sections are commonly used to show both the internal and outside view of symmetrical objects.
Revolving View
A "revolving view" is effective for elongated objects or the elongated section of an object. In this view, the cross-sectional shape of ribs, spokes, and other projections of the object are featured. The cutting plane cuts the object at an angle, but the drawing is rotated for a better view by the observer. It is made by revolving the cross section view of a feature 90° about an axis of revolution and superimposing the section view on the orthographic view.
(A) If the revolved section view does not interfere or create confusion on the view, then the revolved section is drawn directly on the view using visible lines.
When the revolved view is superimposed on the part, the original lines of the part behind the section are deleted.
(B) If the revolved section crosses lines of the view on which it is to be revolved, then the view can be broken for clarity.

- Removed section view
It is similar to revolved section with revolving the cross section 900. However, in this case the cross section is then drawn adjacent to the orthographic view, not on it. Removed sections are used when there is not enough room on the orthographic view for a revolved section.

Broken-out section (Part Sectional views)
It is used when only a portion of the object needs to be sectioned. The following figure shows a part with a portion removed or broken away. A broken-out section is used instead of a half- or full-section view to save time, and a break line is drawn freehand to represent the jagged edge of the break.

Thin wall sections
Ribs, webs, spokes, gear teeth and other thin features are not section lined when the cutting plane passes parallel to the feature. Adding section lines to these features would give the false impression that the part is thicker than it really is.

The following figure shows a cutting plane that passes parallel to and through a web (SECTION B-B).
Leaving thin feature un sectioned only applies if the cutting plane passes parallel to the feature. If the cutting plane passes perpendicular or crosswise to the feature (cutting plane A-A), section lines are added as shown in figure (C).
Hatching
On sections and sectional views solid area should be hatched to indicate this fact. Hatching is drawn with a thin continuous line, equally spaced (preferably about 4mm apart, though never less than 1mm) and preferably at an angle of 45 degrees.
 Hatching a single object
When you are hatching an object, but the objects have areas that are separated, all areas of the object should be hatched in the same direction and with the same spacing.
Hatching Adjacent objects
 When hatching assembled parts, the direction of the hatching should ideally be reversed on adjacent parts. If more than two parts are adjacent, then the hatching should be staggered to emphasize the fact that these parts are separate.
 Hatching thin materials
Sometimes, it is difficult to hatch very thin sections. To emphasize solid wall the walls can be filled in. This should only be used when the wall thickness size is less than 1mm

Hatching large areas
When hatching large areas in order to aid readability, the hatching can be limited to the area near the edges of the part.
Drawing threaded parts
Drawing Conventions
|
Threads are drawn with thin lines as shown in this illustration. When drawn from end-on, a threaded section is indicated by a broken circle drawn using a thin line. |
|
|
Frequently a threaded section will need to be shown inside a part. The two illustrations to the left demonstrate two methods of drawing a threaded section. Note the conventions. The hidden detail is drawn as a thin dashed line. The sectional view uses both thick and thin line with the hatching carrying on to the very edges of the object. |
|

General rules for sectioning:
- Hatching is generally used to show areas of sections.
- The simplest form of hatching is usually drawn by continuous thin line at a convenient angle, preferably 45˚ to the principal outlines or lines of symmetry of the sections.
- Separate areas of the section of the same component shall be hatched in an identical manner.
The hatching of adjacent components shall be carried out with different directions or spacing.
- Spacing between the hatching lines should be chosen in proportion to the size of the hatched areas.
- In the case of large areas, the hatching may be limited to a zone following the contour of the hatched area.
- Where sections of the same part in parallel planes are shown side by side, the hatching shall be identical, but offset along the dividing line between the sections if greater clarity is considered necessary.
- Hatching shall be interrupted when it is not possible to place inscriptions outside the hatched area.
Eg: Dimensioning in hatched area:
Dimension lines are normally shown outside the drawing, but in some unavoidable cases they can be shown inside the drawing itself. However dimension is to be drawn on the hatched area, the hatching lines are broken at the place where dimension value is to be written.
Planning your engineering drawing
Before starting your engineering drawing you should plan how you are going to make best use of the space. It is important to think about the number of views your drawing will have and how much space you will use of the paper.
- Try to make maximum use of the available space.
- If a view has lots of detail, try and make that view as large as possible. If necessary, draw that view on a separate sheet.
- If you intend to add dimensions to the drawing, remember to leave enough space around the drawing for them to be added later.
- If you are working with inks on film, plan the order in which you are drawing the lines. For example you don't want to have to place your ruler on wet ink
Lines and line styles
In the first tutorial we learnt how to create simple shapes using the place line tool. The lines we created were all of the same thickness and type. But lines on an engineering drawing signify more than just the geometry of the object and it is important that you use the appropriate line types.
Line Thickness
- For most engineering drawings you will require two thickness', a thick and thin line. The general recommendations are that thick lines are twice as thick as thin lines.
|
A thick continuous line is used for visible edges and outlines. |
|
A thin line is used for hatching, leader lines, short centre lines, dimensions and projections. |
Line Styles
- Other line styles used to clarify important features on drawings are:
|
Thin chain lines are a common feature on engineering drawings used to indicate centre lines. Centre lines are used to identify the centre of a circle, cylindrical features, or a line of symmetry. Centre lines will be covered in a little bit more detail later in this tutorial. |
|
Dashed lines are used to show important hidden detail for example wall thickness and holes.. |
Source : http://xa.yimg.com/kq/groups/16377466/592328345/name/Engineering+Drawing+(SI.+T3).doc+manas.doc
Web site link to visit: http://xa.yimg.com
Google key word : Sectional views in engineering technical drawings file type : doc
Author : NTTF Mr. Praveenkumar M Checked by Mr. S.Rao
If you are the author of the text above and you not agree to share your knowledge for teaching, research, scholarship (for fair use as indicated in the United States copyrigh low) please send us an e-mail and we will remove your text quickly.
Sectional views in engineering technical drawings
If you want to quickly find the pages about a particular topic as Sectional views in engineering technical drawings use the following search engine:
Sectional views in engineering technical drawings
Please visit our home page
Larapedia.com Terms of service and privacy page

